How to Build A Pole Barn: The Self-Reliant Homeowner’s Complete Guide
June 27, 2025

Why DIY Pole Barns Are Surging in 2025 (And How You Can Build Your Own Pole Barn)
Pole barn construction is booming in 2025, driven by homeowners, farmers, and small businesses looking for affordable, flexible, and durable building solutions. Once limited to basic agricultural use, pole barns have evolved into versatile structures that serve as garages, open-air workshops, and dedicated shelter for everything from equipment to recreational vehicles.
Open-concept layouts and multi-use spaces dominate this year's top design trends. Property owners want their structures to serve as functional spaces. Modern pole barns now reflect the priorities of savvy, forward-thinking business or property owners.
Material prices are expected to rise by five to seven percent this year, so now may be the most cost-effective time to build. With minimal site prep and the ability to go from dirt to done in a fraction of the time of traditional barns, pole barns remain one of the fastest and most practical building options for 2025.
Are You Cut Out for This? A Quick DIY Pole Barn Readiness Check
The good news is you do not need to be a contractor to build a pole barn. The process is straightforward and well-documented, especially if you purchase a DIY kit. Most kits include ready-to-assemble materials and instructions that are easy to follow, even for first-time builders.
That said, building a pole barn does require physical effort and know-how. You will dig holes, pour concrete, lift materials, and spend long hours outdoors. You’ll need need to rent professional equipment like a forklift or aerial man lift, unless you have access to them already. Reasonable fitness and a commitment to the process go a long way. If you’re not comfortable working at height or operating heavy equipment, a DIY kit might not be the best route, talk to Matador about your options.
Permits are usually simple to obtain, and many jurisdictions accept hand-drawn plans or templates. If you’re building from a pole barn kit, you should receive detailed instructions from your supplier. If you’re creating something from scratch, you might find free plans through agricultural extension services or online.
If you have a “weekend” mindset and the know-how and drive, you can make this happen! Many suppliers can also offer guidance. If you’ve gone the “from scratch” DIY route, you could be on your own if you run into challenges, so proceed with caution on that.
Step-By-Step Planning to Build A Pole Barn Like A Pro
Before building, decide how you will use the barn. Are you creating a storage space, workshop, or large equipment shelter? Defining the purpose and layout clearly will help you avoid mistakes. In 2025, open floor plan designs are trending, giving you the flexibility to adapt as your needs evolve.
With pole barns like those from Matador, practically any site can be the site for your perfect pole barn. Since there’s no slab, when you build a pole barn there’s no need to level the area or worry about drainage, unless that’s a consideration for what you’ll be using it for. If so, select your site appropriately. Once you’ve chosen your site, mark your layout with stakes and string, and plan for access to utilities and vehicles, as needed.
Kit or Custom? Build A Pole Barn That Matches Your Goals
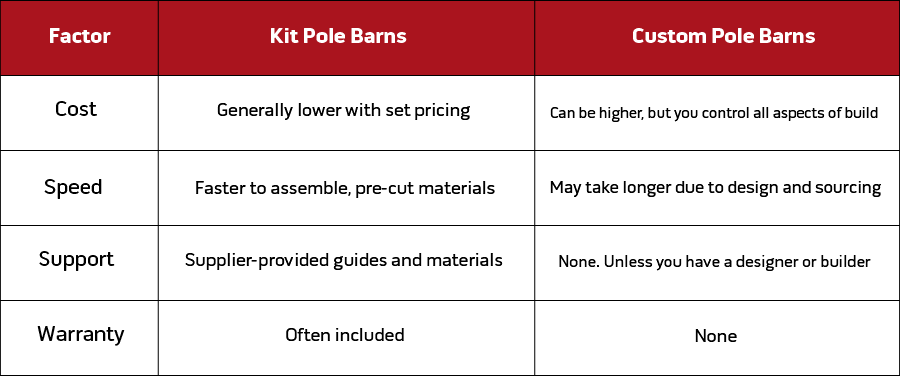
Pole barn kit pricing remains attractive in 2025 offering clear expectations and simple pricing. Kits are an excellent choice for a budget-friendly build with guided support. A custom pole barn approach allows freedom in all aspects of the build, but you can expect higher cost and no support.
Tools, Time and Materials: What It Really Takes to Build Your Own Pole Barn
Here’s a quick look at what you will need before starting:
 Essential Tools and Equipment:
- Measuring tape, string, stakes
- 2” ratchet snaps or cable puller
- Metal snips
- Choker for lifting trusses
- Ratchet and sockets
- 4’ level
- 25’-100’ tape measure
- Power drill and bits
- Forklift
- Aerial man lift
- Post hole digger or auger
- Concrete mixer and trowel
- Safety gear
Materials:
- A ready to use pole barn kit from a trusted supplier will include all necessary materials.
If you’re going from scratch here are some things you’ll likely need:
- Treated posts or poles
- Roof trusses and roofing panels
- Fasteners and structural supports
Time Commitment: Some kits, like those from Matador, can be assembled in just a few hours. If you’re making something custom from scratch, it might take several days to complete.
Pole barns remain among the most cost-effective permanent structures available. Lower material costs, fast construction timelines, and reduced labor needs make them appealing for anyone focused on value.
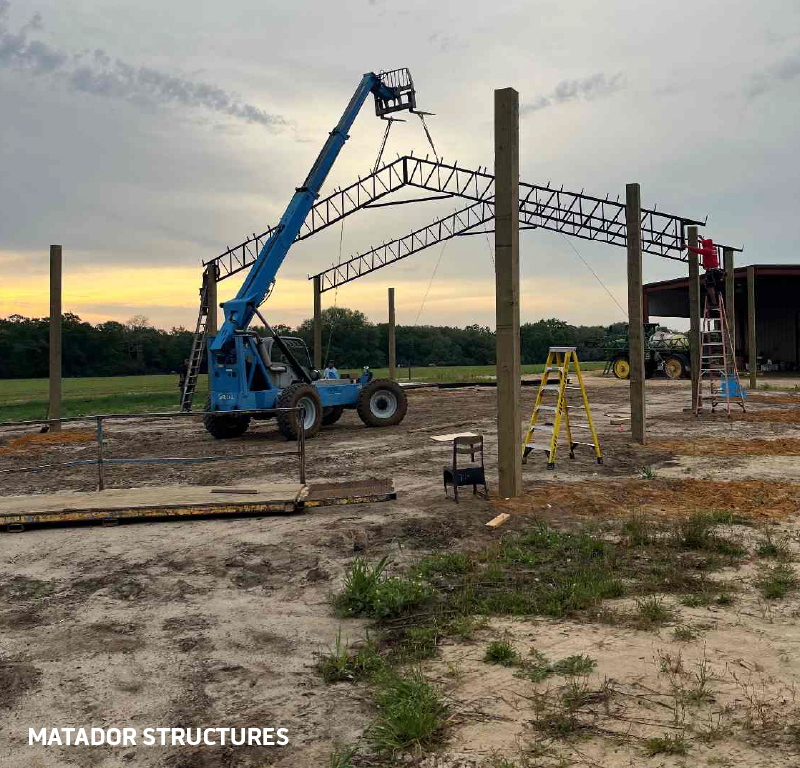
The Build Process, Step by Step (From Dirt to Done)
Here’s a basic rundown of the process for building a pole barn, but be sure to pay particular attention to the instructions from your supplier.
- Site Preparation: As mentioned, with no slab, there’s only minimal site prep necessary. You might opt to clear the site, leveling the area, and laying gravel, if desired.
- Set the Poles: Dig post holes below the frost line, usually 3 to 4 feet deep. Set the posts plumb and pour concrete footings to secure them.
- Framing: Once the concrete has cured, install roof trusses, paying attention to the detailed instructions from your supplier.
- Roof Installation: Secure roofing panels onto the trusses using appropriate fasteners.
The core steps of pole barn building are surprisingly simple. The basic process is to create a level base, place vertical poles in the ground, connect them across the top with beams, and finish with roof trusses. No complicated foundation is needed.
Many builders comment that the experience of building a pole barn is gratifying and empowering, particularly when they see the structure take shape and know that it will last for decades.
What To Do Next: Get A Quote, Ask Questions, Start Building
Pole barn kits vary by supplier, all pole barn kits from Matador include materials, fasteners, and a complete instruction packet. There’s also customer support and a warranty on materials. Having access to expert advice during your build can make all the difference.
You’ve got this. Whether you start with a kit or a custom plan, you are building something to serve your needs. And, when you choose Matador, we’re here to help.
Contact us to request a quote, or ask questions about our pole barn kits.


