Pole Barn Mistakes That Cost Thousands (And How to Avoid Them)
March 19, 2026

Building a pole barn, or post-frame building, looks simple enough until you're staring at a structure that's leaning to one side, scratching your head about what went sideways. Here's the thing: problems with most buildings that fail catastrophically can be traced back to just a handful of mistakes made during construction. Knowing which errors will destroy your building versus which ones just bug you a little helps you figure out when to panic and when to breathe easy. To build a pole barn that lasts for decades, there are a few critical decisions to make during planning and construction.
What Actually Causes Pole Barns To Fail
When pole barns go wrong, they fall into two buckets: the kind of failures that threaten the whole structure, and the kind that just look bad. Structural failures compromise the building's ability to remain standing safely. Cosmetic stuff annoys the heck out of you, but won't bring the roof down on your head. Why does this matter? Because if you freak out over a harmless crack thinking it's structural, you'll blow money fixing something that didn't need fixing. On the flip side, if you shrug off real structural problems, you could lose the entire building.
Structural Failures Versus Cosmetic Issues
Here's how you spot the difference: structural failures keep getting worse. Got a post that's leaning a bit more every month? That's your foundation giving up. Are doors getting harder to close over time? Your building's shape is changing. Roof sagging deeper after each snowfall? You don't have enough support holding things up. These problems accelerate over time and should be addressed right away.
Cosmetic issues? They stay put. A hairline crack in your siding that looks the same today as it did six months ago is cosmetic. A small gap that showed up right after construction but hasn't budged since is just the building settling, not falling apart. Door hardware that needed one tweak but now works perfectly fine is just a normal installation variation, not the building slowly collapsing.
Key Takeaway: If something keeps changing, that's a structural problem demanding action. If it's stable—even if it's not perfect—you're probably looking at normal building behavior that needs watching but not emergency repairs.
The Three Root Causes Of Collapse
Most pole barn disasters come down to three things: you didn't dig deep enough for the foundation, you didn't spread the weight around properly, or water's getting where it shouldn't. Foundation issues show up as posts leaning or different parts of the building settling unevenly. When you mess up load distribution, you get sagging roofs or cracked connections. Water damage sneaks up slowly, causing posts to rot over the years until they can't hold the weight anymore.
These three problems love to team up. Posts that aren't deep enough settle weird under the roof's weight. Bad drainage speeds up rot in posts that were already struggling. Figure out which root cause you're dealing with, and you'll know whether you need foundation work, structural beefing up, or better drainage.
The Foundation Mistakes That Destroy Everything
Foundation screw-ups cost more to fix after you're done building than any other type of mistake. If you have a pole barn that's leaning, you’ll need to take the whole thing apart, yank out the posts, put in new ones, and rebuild everything. Catch foundation problems while you're still building? You're looking at hundreds of dollars to fix. Find the same problems after everything's finished? Thousands.
Why Frost Line Depth Matters
The frost line is how deep the ground freezes in winter where you live. When soil freezes, it expands. If you set posts above the frost line, they get shoved upward when it freezes and drop back down when it thaws. It works like a ratchet—posts creep up a little each winter and settle unevenly each spring, never quite ending up where they started.
Frost depth requirements vary by region. Your local building department or state Department of Transportation can provide the exact frost depth for your area. As a general guide, frost lines range from about 12 inches in southern states to roughly 48 inches across the northern tier, with some locations in Minnesota and Alaska exceeding 60 inches. Posts must extend below this depth, and many codes require an additional margin of 6–12 inches for safety.
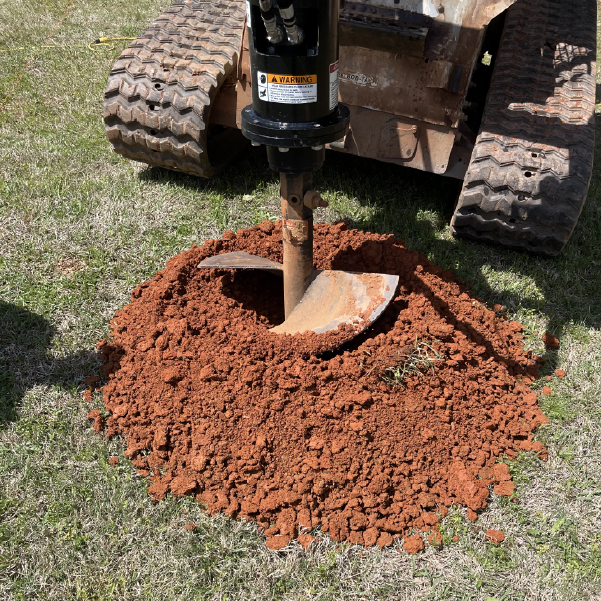
The Backfill And Compaction Mistake
Even if you dig deep enough, posts still fail when you don't compact the backfill correctly. Loose dirt around posts settles over time, creating gaps that allow the posts to wiggle. Professional installers put backfill in 6-inch layers, adding dirt bit by bit and packing down each layer hard. DIY folks usually dump all the dirt back in at once, which can settle significantly during the first year if it isn’t compacted in lifts.
This settling screws up the concrete collar if you poured one. The collar hangs there with an air gap under it, providing no lateral support. Posts rock around in their holes even though they seemed rock-solid at first.
Concrete Collars And Cure Time
Concrete serves two functions: it locks posts in position and provides lateral stability. Concrete collars typically extend below grade around the post to lock it in position and provide lateral resistance. The collar should be 12-16 inches in diameter for 6x6 posts.
Research from Portland Cement Association shows concrete reaches approximately 70% of its final strength in 7 days at 70°F, but requires 28 days for full cure. Temperature dramatically affects this timeline. At 50°F, the same strength takes 14 days. Below 40°F, curing nearly stops without special additives.
Builders who load posts before the concrete fully cures create micro-cracks in the collar. These cracks don't fail immediately but allow water infiltration that expands during freezing, progressively weakening the collar until it crumbles 2-5 years later.
Pro Tip: Mark your calendar for 28 days after pouring concrete, regardless of how solid it feels. Loading posts early saves a few days but risks thousands in future foundation repairs when collars fail prematurely.
Why Post Spacing And Placement Matter More Than You Think
Post spacing isn't something you just eyeball. Engineers calculate spacing based on your building's size, roof load, and your area's snow and wind requirements. If you change the spacing to make your lumber come out even or to dodge something underground, you might overload the posts and cause them to fail under the weight they're supposed to handle.
How Load Calculations Actually Work
Roof loads are transferred through trusses to posts. Each post carries the weight of the roof section between it and adjacent posts. Eight-foot post spacing means each post supports an 8-foot-wide section of the roof. Increasing spacing to 10 feet increases the load each post carries by 25%. This requires either larger posts or stronger girts spanning between them.
According to American Wood Council design standards, snow loads in northern states can exceed 50 pounds per square foot of roof area. A pole barn with 8-foot post spacing and 12-foot eave height creates approximately 96 square feet of roof load per post, totaling 4,800 pounds per post in high snow regions. Moving posts 2 feet farther apart adds another 1,200 pounds per post.
The Roof And Truss Mistakes That Show Up Later
Roof problems often hide until you get hit with the first big snow or serious windstorm. Mistakes made when putting things together don't create obvious problems right away, but they eat away at capacity, which won't show up as an issue until years later.
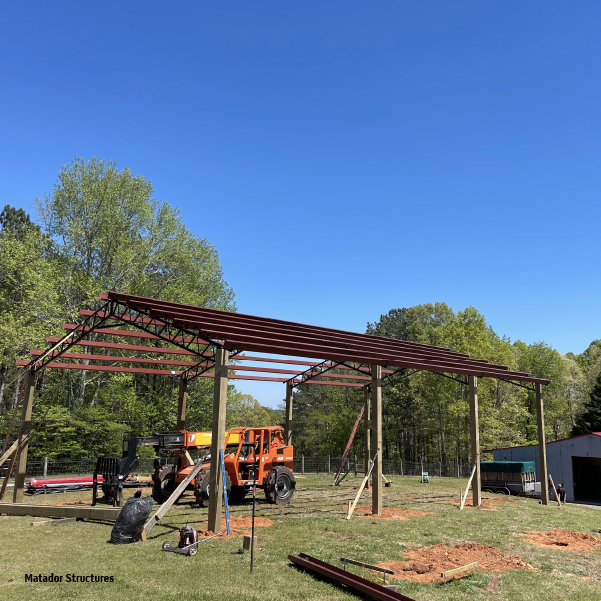
Truss Bracing That Actually Prevents Sag
Trusses need side-to-side bracing to keep them from buckling under weight. Without bracing, trusses can fold sideways like dominoes even though they look plenty strong when you're staring straight at them. Proper bracing means continuous runs connecting the same spots on all your trusses, creating one rigid unit.
You've got to install bracing before you put the roofing on. Many builders skip temporary bracing during construction, allowing trusses to shift out of position. Once that metal roofing goes on, the trusses are locked in whatever wonky positions they ended up in, giving you a wavy roof and panels that don't sit right.
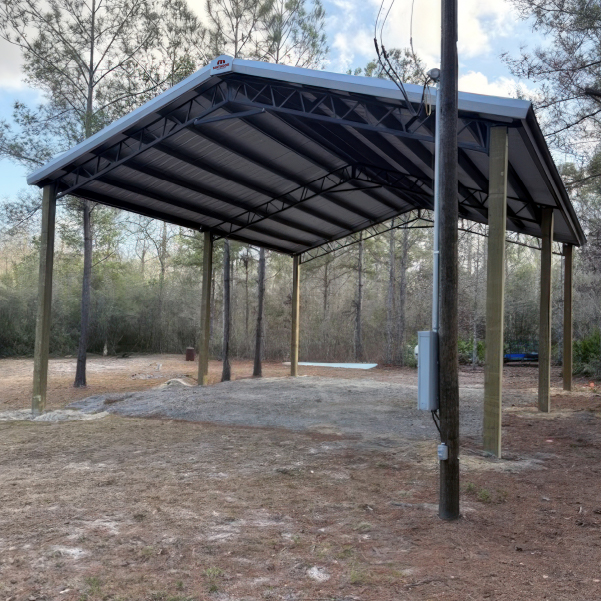
The Metal Roofing Installation Error
Metal roofing isn't structural—it isn’t designed to hold up the building. Builders who slap on roofing before finishing the girt systems or getting purlins spaced right are forcing those metal panels to act like structural members. Panels start oil-canning, fasteners pull through, and the roof develops leaks wherever it's stressed.
Purlins shouldn't span more than 24 to 30 inches for standard gauge metal panels. Going wider saves money on lumber but puts more strain on the panels, creating sags between supports where water pools and rust sets in faster.
Recognizing Early Warning Signs
Roof sag becomes visible once deflection passes 1/180th of the span. On a 12-foot span, you'll start seeing sag around 3/4 inch of deflection. Check by looking along the roof ridges and eaves from the ground. Wavy lines are a sign of uneven truss support or members that are failing. Interior inspections catch problems earlier. Look for truss members that touch where they shouldn't, gaps that open up at the connections, or cracks in gusset plates. These signs tell you the roof system is overstressed and is close to its limit.
Key Takeaway: Some roof deflection in a new pole barn is normal. Settling of about 1/8 to 1/4 inch over a 12-foot span during the first year can occur as lumber moisture content stabilizes. Deflection beyond that, or increasing deflection, should be evaluated by a qualified engineer.
How Water And Drainage Problems Wreck Pole Barns
Water causes more long-term pole barn failures than anything else. Poor drainage can rot posts and soak the soil, making foundations shift. This creates moisture problems inside that damage what you're storing and mess with air quality.
Site Grading And Drainage Design
 The ground should slope away from your building at a minimum 2% grade—that's 1/4 inch per foot—for at least 10 feet in every direction. This pushes surface water away before it can saturate the soil around your posts. Buildings put up on flat ground or in bowl-shaped sites collect water that's got nowhere to go.
Clay soils make drainage problems worse by stopping water from soaking downward. Water pooling around posts creates soaked conditions that accelerate rot even in treated lumber. Sites with bad natural drainage need extra help, like perimeter French drains or floors built up higher.
Post Base Protection Methods
Treated lumber resists rot but isn't rot-proof. Posts in constant ground contact face the highest moisture exposure in the building. When drainage is poor and water stays around the base of the post, decay accelerates even in pressure-treated lumber. Improving drainage around the post base dramatically extends the service life of the structure.
Gravel collars around post bases improve drainage and significantly extend post life. A 12-inch layer of 3/4-inch crushed stone surrounding the post allows water to drain away rather than sitting against the wood. This simple addition can double the lifespan of the post, even in marginal soil conditions.
Pole Barn Foundations: Normal Settling Versus When You Need To Act Fast
All buildings move around as they settle onto foundations and materials reach moisture equilibrium. Knowing the difference between normal adjustment and structural failure stops you from both overreacting and dangerously ignoring real problems.
What Normal Settling Looks Like
Dimensional lumber shrinks 3-8% across the width during the first year as moisture content drops from 19% to 12-15%. A 6x6 post can shrink up to 1/4 inch. This affects the tightness of connections and can create minor gaps at joints.
Uniform settling under 1/4 inch occurring during the first 6-12 months is normal. The building should stop moving once materials stabilize and soil compacts under the foundation load. Settling that continues beyond the first year or exceeds 1/4 inch indicates foundation problems requiring investigation.
Red Flags That Signal Structural Problems in Your Pole Barn
Progressive movement always needs attention. Posts leaning further every month mean foundation failure. Gaps that keep widening show ongoing structural distortion. Doors getting harder to close over time mean the building is deforming beyond normal tolerance.
Differential settling creates the most dangerous situations. When one corner settles while the others don't, the building twists. This concentrates stress at connection points and can cause sudden failure. Any visible twist or rack in the building frame needs to be looked at by a professional immediately.
When To Call A Structural Engineer
Get a structural engineer when you see movement going over 1/4 inch, any progressive change continuing past 12 months, cracks wider than 1/8 inch that grow over time, or multiple doors and windows binding at the same time. These conditions point to problems beyond normal settling that need professional diagnosis.
Key Takeaway: You can tell if your pole barn is leaning by verifying that the posts are plumb. Use a level or string reference and document measurements monthly to detect progressive movement.
DIY Mistakes That Seem Small But Cost Big
First-time builders consistently mess up three things: they underestimate concrete cure time, skip temporary bracing while they're building, and try to do jobs meant for multiple people by themselves. These mistakes create problems that get worse over time.
The Concrete Cure Time Mistake
Concrete feels solid after 24 to 48 hours, but it hasn't hit full strength yet. Loading posts before the concrete is completely cured creates tiny cracks that hurt long-term durability. The posts look stable at first, but, in reality, they have a weakened collar that will eventually fail, leading to expensive foundation repair.
Temperature affects cure time massively. Summer pours cure faster. Winter pours need protection and extra time. We say wait the full 28 days, no matter how solid that concrete feels, or use actual strength testing if your schedule's tight.
Temporary Bracing Nobody Talks About
Pole barns that are only partially built don't have the rigidity of finished structures. Wind can push posts out of plumb while you're working. Trusses installed without bracing shift around before roofing locks them in position. These movements become permanent once you finish building around them.
Diagonal bracing on posts and continuous lateral bracing on trusses keep everything plumb and square during construction. Remove temporary bracing only after permanent structural elements are in place. The cost of bracing lumber is nothing compared to fixing a building that went up crooked.
Working Alone Versus Working Safe
Setting posts, raising trusses, and installing roofing all require at least two people for safety and quality. If you try to tackle these tasks alone, problems show up quickly. You could end up with posts set out of plumb because you can't hold them and brace them at the same time. Trusses can be dropped, which damages connections. And the roof may leak because the panels are not aligned correctly.
Safety aside, quality suffers when you work alone. You can't hold a level, adjust position, and secure fasteners all at once. The misalignments that result compound throughout construction, creating a building that looks amateurish and performs poorly.
 What It Actually Costs To Fix Common Pole Barn Mistakes
Foundation mistakes cost $5,000-$15,000 to correct after construction, versus $500-$1,500 to do correctly initially. Repairs require removing siding to access the posts, excavating around foundations while supporting the building structure, and often replacing posts entirely. The building may need temporary support during foundation work, which would add equipment rental costs.
Roof system errors run $3,000-$8,000 for repairs versus $400-$1,000 for proper initial installation. Fixing roof problems requires removing metal panels, correcting truss or purlin issues, and reinstalling roofing. Panel removal damages many panels, requiring replacement rather than reuse.
Water damage remediation depends on severity. Surface drainage fixes cost $1,500-$4,000 for grading and gutters. Post replacement due to rot damage runs $800-$1,500 per post, including excavation, support systems, and reconstruction. Buildings with multiple rotted posts may cost more to repair than rebuild.
Prevention through proper initial construction costs roughly 5-10% more than cutting corners, but prevents repair costs that can exceed 50-100% of the original building investment. The economics strongly favor doing it right the first time.
Pro Tip: Get multiple quotes for both initial construction and potential repairs. Understanding the full financial picture helps you make informed decisions about whether to invest during construction or accept the risk of future repairs. Many builders find that professional help for critical steps like foundations costs less than DIY mistakes.
Most pole barn problems don’t start during construction; they start during planning. Talk with experienced professionals like those at Matador Structures to ensure your site, design, materials, and layout are right from day one. Expert guidance through permitting, engineering considerations, load requirements, and future expansion planning can prevent the costly mistakes that surface years later. The right advice up front protects your investment long after the last post is set.
Frequently Asked Questions About Pole Barn Mistakes and Repairs
How do I avoid foundation errors in a pole barn?
Foundation mistakes usually start with improper site preparation. Make sure posts extend below the local frost depth, compact backfill in layers, and provide proper drainage around the post base. Getting these steps right prevents the settling and shifting that cause most foundation failures.
How does choosing the wrong site impact a pole barn?
Choosing the wrong site can lead to drainage problems, uneven settling, and higher construction costs. Low or poorly drained areas allow water to collect around the posts, accelerating rot and weakening the foundation. Sites with uneven terrain may also require extensive grading before construction can begin. Selecting a site too close to property lines or utility easements may result in legal disputes or restrictions on future expansion.
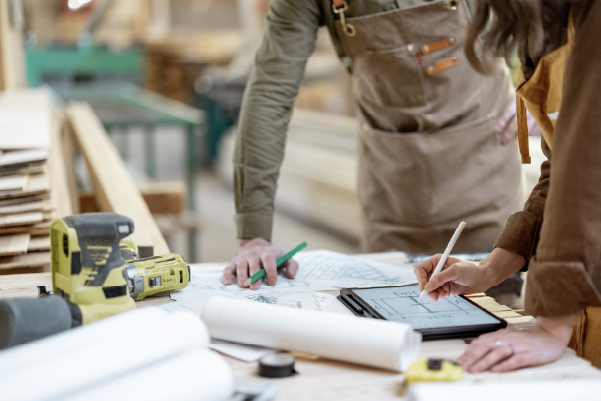
How can poor planning lead to pole barn mistakes?
Poor planning often leads to mistakes in site selection, foundation depth, and structural layout. With no clear plan, builders may underestimate material needs, overlook drainage issues, or choose a location with unstable soil. These problems can create structural issues that are expensive to fix later.
How do inadequate materials cause problems in pole barns?
Using the wrong materials can lead to structural and durability issues. Posts that aren’t properly treated for ground contact may rot prematurely, and low-quality fasteners or connectors can fail under load. Poor roofing materials may also lead to leaks and long-term water damage.
How might incorrect measurements affect a pole barn build?
Incorrect measurements can cause posts, trusses, and framing members to fall out of alignment. Poor spacing between posts can overload structural members or create uneven roof support. Measurement mistakes also lead to material waste, costly rework, and delays during construction.
How can I prevent moisture issues in a pole barn?
Moisture problems are usually caused by poor drainage and lack of ventilation. Grade the site so water flows away from the building, and install gutters to direct rainwater away from the posts. Proper ventilation helps reduce humidity and prevents condensation inside the structure.
How does insufficient insulation become a mistake in pole barns?
Insufficient insulation can lead to condensation, temperature swings, and moisture buildup inside the building. These conditions can damage stored equipment and accelerate deterioration of structural components. Proper insulation and ventilation help control moisture and maintain more stable interior conditions.
How can a lack of permits cause problems for my pole barn?
Building a pole barn without the required permits can lead to fines, stop-work orders, or even orders to remove the structure. Permits ensure the building meets local zoning rules and safety codes. They can also become important later when selling the property or applying for insurance.


